I don’t do resolutions. More accurately, I don’t do New Year resolutions. The date seems rather arbitrary and expectations for a fresh calendar are already too high. In years past I have done birthday resolutions for MY new year, and starting a blog has been on the preliminary list many times, but has never made the final cut.
Why is this year different? Because 2016. Because we moved across the country and I had, in the three years since we last moved across the country, forgotten how thoroughly taxing that is, because the entire celebrity population of my childhood died, because global politics is playing out on Twitter now and the world has stopped making sense. I needed a fresh approach, but the idea wasn’t meant to be a blog.
I decided to challenge myself to try fresh ideas in the kitchen, one new recipe a week for a year. Unless we go on vacation. Or I’m sick. Or the kids are sick. Or I forget or we get bogged down in leftovers. I finally settled on an AVERAGE of one recipe per week. 52 recipes in 365 days. I originally thought I’d use Instagram to post shots of my dishes and use the caption for the family’s reviews. I’d even decided to tag them #fiftytwoin2017. For accountability, I shared my plan on Facebook. The response was encouraging but as friends started asking me to share the recipes, to get them out of their rotating menus and culinary comfort zones, it got bigger than Instagram and Facebook. I couldn’t bring myself to post a multi-paragraph status update, and certainly not a weekly one. This project needed its own space. So the blog, in it’s own way, made the cut this year.
No actual recipe today, I realize the title is misleading.
This weekend, I was reminded that no matter how long I have it or how much I read and watch out for myself, I will never be 100% on top of my mental illness.
Things (external) have been going well, great even. Work is awesome, the kids have been great, Wombat is actually not traveling for a few consecutive weeks (and we’ve seen him on weekdays before dark now that the time as changed). I’ve finally completed the redecorating of our formerly-neon flamingo pink powder room, made some fantastic meals (Teriyaki Tuesday is the new scene here – we’ve finally found a sauce that Meatball will eat!), seen friends and bought some incredible new yarn (my fiber friends get it). All was (seemingly) well. On Friday, I received an email from Peanut’s teacher about an incident from the previous day, and Peanut had not told me about it. I was sad, frustrated, and disappointed, and it weighed on me all weekend. All of the sudden, nothing seemed right. I didn’t want to meet a friend for lunch, I almost skipped picking up said incredible yarn, I didn’t want to knit. I gave Wombat full control of the pizza order Friday night. Full control. To someone else. About food. This is when alarm bells should have started going off for both of us.
What bothered me most is how much this bothered me. Of course it’s normal to be upset when things go a little bit south, but I couldn’t figure out why this one little setback threw me so hard. Being introverted and affected with anxiety, I stayed awake most of the past 3 nights thinking about it. So now I’m exhausted in addition to everything else, but I’m also more aware of what’s really going on. It wasn’t the email from the teacher that made everything seem so bad. Everything was already well on its way, the email was simply the proverbial last straw. This episode has been creeping up on me for a couple of weeks. I’ve been neglecting many of my necessary self-care routines; the depression itself convinced me that neglecting self-care was self-care. I’ll explain.
Eating healthful foods in reasonable portions is a huge part of taking care of my body so my body can take care of my brain. I guess about 2 weeks ago (right around that lost hour of daylight savings sleep), my eating habits went off the rails. We’re talking an entire package of cookies in 2 days off the rails, and the voice in my head that usually says “you know carrots and hummus is a better choice and will have you feeling better over the next few hours” was instead saying “cookies taste good and you are sad, cookies will make you happy right now, so you deserve them” and then later “well you’ve eaten so many cookies you might as well finish them, it doesn’t even matter anymore.” My sluggish and tired body then made me choose to consume more caffeine, which had a disastrous effect on my sleep.
Exercise is another essential piece of treating my mental illness. When I exercise hard and regularly, I feel better, I sleep better, and when I feel and sleep better, I make better choices and accomplish more things, which makes me feel and sleep better, which…. you get the idea.
Working out with an exhausted body fueled by only cookies and coffee sucks. And so my mental health house of sticks came crashing down.
I don’t blame the cookies (cookies exist for joy and it’s not their fault when we abuse them!), I had forgotten to be on guard for the apathy of depression. Depression isn’t always lying in bed crying for days, sometimes it’s just not caring at all. I took care of others. I went to work and fed the kids and folded laundry and painted the bathroom and did all the things I’d promised or felt obliged to do for other people, but I stopped checking in with and caring for myself, and it finally caught up with me on Friday evening, when I finally cracked under the accumulated apathy and negative thoughts and self-neglect.
Recently, I’ve made a conscious decision to be more open about my mental illness, but until today it has been mostly generalities and just acknowledgement of the condition. Putting all of this down is actually step 2. Step one was having müsli bread (Nigella Lawson’s Lazy Loaf from Nigella Express) for breakfast and stopping at just one cup of coffee. Step 3, in a few seconds, I’m heading to the gym. Then, I have a date with some worsted 50/50 wool/alpaca (yarn stuff).
Maybe next time we’ll talk Teriyaki Tuesday (Get a bottle of Soy Vey teriyaki sauce and you’re halfway there)!
Happy Valentine’s Day, or, as we call it here, Violetine’s Day! Today is the arbitrary date we chose to be our rescue dog Violet’s birthday. She is four and, mercifully, starting to calm down.
Wombat and I don’t do Valentine’s Day. There are many reasons, most of them practical in nature (Try booking a restaurant and a sitter for tonight? No, thanks!), but our primary reason is this: we got engaged on February 9. We have our own holiday, we call it Us Day.
Yes, Us Day is sweet and special and not hyped by Big Greeting Card, but it’s not untouchable. In the past we’ve gone to fancy restaurants, done a weekend away, really put effort into making Us Day about, well, us. Of course we’ve also had years when Wombat was at sea or I was significantly pregnant (One year had both. Not my favorite), but this year was something truly special.
This year, on Us Day, Wombat took Peanut and Meatball on an overnight with Cub Scouts and I had the house to myself for 18 hours straight and it was everything I could dream of and more. No one asked me for a snack for a whole day. I was able to knit uninterrupted, take up the entire bed, and best of all, make something no one else likes for dinner and not hear a single complaint.
Old Rag Pie caught my eye the first time I leafed through Simply Nigella because it includes Feta cheese and honey, and I am a sucker for any sweet/savory combination. It’s filo pastry, cheese, and custard with herbs and honey and would be perfect if not for my family, who hate Feta (Wombat and Meatball) and/or eggs (Peanut). I had all but forgotten about it when it popped up as the recipe of the day on Nigella’s Instagram the very morning of Us Day. The only ingredient we didn’t already have on hand was Feta. Perfect. This recipe was dinner and breakfast for my period of solitude.
I made this cheese pie while enjoying other cheeses with wine because there is no such thing as too much cheese.
Old Rag Pie from Nigella’s Recipes, as always, my notes are in bold.
7 tablespoons soft unsalted butter I used 8 because I’m apparently too lazy to cut a tablespoon off a stick of butter.
10 ounces frozen filo pastry (thawed) I used 8 ounces because my one pound box of frozen phyllo was divided into two individually wrapped rolls and see above.
8 ounces feta cheese No change, my feta arrived at this weight (yay!).
2 teaspoons grated parmesan
2 teaspoons leaves from fresh thyme (or 1 teaspoon dried) I used dried and totally winged it on quantity. I measured in “sprinkles”.
2 large eggs
⅔ cup whole milk
1 tablespoon sesame seeds I did not have these, nor did I miss them.
1 jar of good honey (such as Greek thyme honey or orange blossom honey) A couple things about the honey: first, the jar is for serving with the pie; I freaked out about how much honey is “1 jar” for too long before reading the whole recipe. Second, use GOOD honey. I used wildflower honey that my mom orders from some place in a state where neither of us lives. Find a quality honey, local if possible. Something with a complex flavor, not that clover stuff from the grocery. I realize I sound like a honey snob but because you pour it on at the end, it really does make a difference.
You will need 1 x 20cm/8-inch square cake tin (preferably non-stick). I used a 9 inch round because I don’t have a square nonstick and I hate scrubbing. I also lined it with parchment.
Melt the butter in a small saucepan, then take it off the heat.
Line your cake tin with a layer of filo, making sure it comes up the sides; you will need to use more than one sheet. Then pour 1 tablespoon of melted butter over the pastry.
Using one third of the remaining filo sheets, tear and scrunch the sheets up and drop them loosely in the tin. Then crumble in half the feta, sprinkle with 1 teaspoon of Parmesan and just under ½ teaspoon of thyme leaves (or ¼ teaspoon of dried thyme) and pour a third of the remaining melted butter over the top. My filo hadn’t quite thawed so it mostly crumbled. My final product was perhaps a bit dense because of this but I’m not complaining. Turns out, I’m more impatient than I am a perfectionist.
Repeat, so that you use up all but a little of the butter and a small amount of thyme. For the last layer, you can use larger pieces of filo “rags” (as it’s the lid), filling the tin a little more tightly, but still scrunching them.
Fold the edges of overhanging filo over themselves, and pour the remaining butter on top. Using the sharp point of a knife, make 2 cuts down and 2 cuts across into the filo-packed tin, from edge to edge to create 9 sections. I cut my round tin into 8 wedges. It’s important that you don’t use a blunt knife, as you don’t want to drag the filo or press down on it. This whole process went poorly for me. I don’t know if it was my pan or the knife or my frozen filo, but in the end I decided to perforate the pie rather than slice it, which worked well.
Beat the eggs with the milk, then pour over the contents of the tin. Sprinkle the last bit of thyme along with the sesame seeds on top. Let it stand for at least 30 minutes in a cool place before baking. If 2 hours is easier for your timetable, then put it in the fridge. And you can do this in advance (see Note).
Heat the oven to 200°C/180°C Fan/gas mark 6/400°F, and bake the pie for 30 minutes. When it’s ready, the pastry will be golden and puffed up, and the inside set.
Let it stand for 10 minutes, then spoon 1 tablespoon of the honey over the top. AT LEAST 1 tablespoon. I went for broke with the honey and have no regrets.
Cut into slices or slabs – using a serrated bread knife and sawing action to prevent squishing the filo on top too much, then pushing the knife down to cut through. Serve the pie directly from the tin and put the jar of honey, with a spoon in it (or you can pour it into a jug) on the table for people to add extra as they eat. The parchment enabled me to slide the whole thing out of the pan and slice it on a cutting board, which was much easier on both me and the pan. And always yes to extra honey.
The recipe site includes directions for making ahead and chilling/freezing before baking, which would make this a great dish for entertaining. It also reheats very well. You may be tempted to eat any leftovers cold the next day, but reheating in a 350 oven for 5 minutes (for one slice, the website says 300 for 15 for more) is more than worth the time.
Being a Navy family has meant we have to celebrate when Uncle Sam makes it convenient. Poor Meatball has spent 2 of his 6 birthdays (one and four) moving across the country. Deployments, PCSing, and work travel have made us pretty flexible as to the when of our birthdays, but one thing is certain, the birthday boy gets to pick what kind of cake he wants and I bake it.
Wombat’s cake (which we enjoyed three days after his actual birthday because he was on travel) was a challenge: blueberry cake with vanilla frosting. Two years ago he asked for vanilla cake with blueberry frosting, which was, ahem, a piece of cake. I went to my Cake Bible to search for a recipe, because Rose Levy Beranbaum is a genius of pastries. No luck. I then turned to Pinterest, and while I love Pinterest, recipes tend to shout “Easy!”, “Fast!”, or “Three-Ingredient Recipe!” with the first ingredient being a box of cake mix. I’ll own up to my snobbery, but with very few exceptions I don’t bake from mix, so I returned to the Cake Bible. I thought about mixing blueberries into a vanilla cake, but that’s pretty much a blueberry muffin, which, while delicious, isn’t exactly celebratory. I wanted a more homogenous blueberry flavor and an even texture (and didn’t want Peanut picking whole blueberries out of his cake). My go-to buttercream recipe can be flavored with fruit butter or puree, and I wondered if I could doctor a cake recipe the same way. I knew I’d have to balance moisture, structure, and sweetness but since I was working from a baking powder leavened recipe, I figured acidity wouldn’t be as critical.
Using blueberry jam as my flavoring, I’d reduce the milk and sugar accordingly, and to support the structure that could be compromised by using jam in place of some of the sugar, I used whole eggs in place of some of the egg whites. This also simplified the process (to offset what comes next).
Then, like the geek I am, I mathed. Also, I guessed. The total mass of milk and sugar was 542 g and I decided I could get away with swapping a third of that for jam, so I would use 180 g jam, which, with 13 g of sugar in every 20g of jam, would contribute 117 g of sugar. So I subtracted that from the 300g sugar called for in the recipe, 183g in the new formula. Milk would be reduced from 242g to 180. (teachers, feel free to use this for the next time a student asks “when are we ever gonna use this?”)
This will probably work with any fruit jam, but I would use seedless when possible, blackberry and raspberry seeds can be quite obtrusive.
So, the final ingredient list:
2 large eggs plus 1 egg white (about 135 grams)
180g milk (about 3/4 cup)
2 1/4 teaspoons vanilla
300g cake flour (3 cups)
180g sugar
1 tbsp plus 1 tsp baking powder
1/4 tsp salt
12 tbsp unsalted butter, which MUST be softened. Seriously. I leave my butter out the night before baking to make sure it’s soft enough. Alternatively, you can fill a large bowl with boiling water, let it sit for a minute, pour it out, then invert the warm bowl over the butter. If you have a butter scavenging dog like my friend Jenny, this method is best.
180g blueberry jam
Preheat oven to 350F. Grease 2 9-inch cake pans, line the bottoms with parchment, then grease the parchment and flour the bottom and sides.
Mix the eggs and white, 45 g of the milk, and about half the jam together in a bowl. I use a glass measuring cup for this because that’s easier for pouring it into your mixer bowl later.
Mix the dry ingredients together for about 30 seconds to blend. Add the butter and remaining milk and jam and mix on low until all ingredients are moistened so you don’t get a face full of flour when the real mixing starts (THIS is why the butter has to be soft, there is no creaming step to beat it into submission). Increase to medium speed and beat for 1 1/2 minutes. Scrape down the sides. Gradually add the egg mixture in three batches, beating for 20 seconds after each addition.
Scrape the batter into the prepared pans and smooth the surface. Bake 20-25 minutes, let cool on a rack for 10 minutes, then loosen the sides with a knife or spatula and invert onto greased racks before reinverting so the tops are up. This prevents the layers from splitting. Cool completely.
On to the buttercream. Oh, the buttercream. It should be written BUTTERcream. Go ahead and lose any sense of virtue you may have gained from putting fruit in the cake because we’re about to get down with an entire box of butter.
Vanilla Buttercream (from the Neoclassic Buttercream recipe in The Cake Bible)
6 egg yolks
3/4 cup sugar
1/2 cup corn syrup
2 cups (yup that’s FOUR sticks, one POUND) unsalted butter, softened
2 tsp vanilla
A handheld electric mixer is ideal for this recipe, but it can be done with a stand mixer. I use my stand mixer because we somehow have 2 handheld mixers but not a matching pair of beater attachments for either.
Beat yolks until light in color. Have a greased heatproof glass measuring cup ready.
Combine corn syrup and sugar in a small saucepan and heat while stirring constantly until the sugar dissolves and the syrup comes to a full rolling boil. Immediately transfer to the glass measuring cup.
If you’re using a handheld mixer, beat the yolks with one hand while steadily and slowly pouring the sugar syrup into the bowl. With a stand mixer, pour a small amount of syrup into the bowl and immediately beat oh high for 5 seconds. Stop the mixer and add a larger amount of syrup, beating again, continuing in this manner until you’ve scraped the last of the syrup from the measure.
Continue beating until completely cool. This takes a while, so maybe the stand mixer isn’t so inconvenient after all.
Gradually beat in the butter and vanilla. I cut the butter into 1-2 tbsp sized chunks and add one or two at a time and when they disappear I add more. The frosting will look too runny for a long time but don’t panic, it will eventually resemble a silky, fluffy buttercream. I still panic. Every. Single. Time.
We have somehow found ourselves with two open but almost full jars of seedless blackberry jam in our fridge, so I know what I’m going to try next. With lime buttercream!
We were lucky enough to discover wild blueberries in our backyard last summer, and this year we were able to net a few of the bushes before the birds stripped them clean, but still haven’t picked enough for much more than decorating.
Peanut and Meatball returned to school after the holiday break on January 2nd. They also went to school on January 3rd, but then it snowed and they had snow days on the 4th and 5th. Meatball was also sick on these days so we made popcorn, watched movies, did Shrinky Dinks (still just as fun to press my nose against the oven door and watch them as it was when I was the boys’ ages), and busted out some new colored pencils and sketch books. Over the weekend Meatball was feeling better so they played in the yard, went sledding in the woods with Wombat, and we all made the short drive to a neighborhood hill for bigger, faster sledding. On Monday the 8th, they returned once more to school.
Then it rained, and the rain froze. The county turned into an ice rink overnight. A two hour delay became a school cancellation for Tuesday January 9th. It was an ice day.
I’d already used all of my aces in all of the holes.
Meatball “helps”.
What were we going to do? I’ll tell you what we did. ALL the screens. Computer, TV, video games, handheld video games. If it blinks and beeps, the kids sat in front of it today. Three days of school since December 22nd of last year and Mom threw in the towel. We also made brownies, since I decided that enough time had passed since we ate the last of the Christmas cookies that we could once again bake. I say “we” but in reality I made the brownies and Meatball stirred the chips in and licked the bowl while Peanut watched Pokemon.
I already have a favorite brownie recipe, it’s tucked away inside every box of Baker’s unsweetened chocolate, but the February/March 2018 issue of Cook’s Country magazine had a one bowl brownie recipe in it, and they’ve not yet steered me wrong. What really interested me was that this recipe also had several variations, including White Chocolate Raspberry Brownies. I had a comically teeny (3 tablespoons) jar of raspberry jam and some white chips in the pantry, so I didn’t even have to brave the now dry and perfectly safe roads!
Original recipe is below, my notes are in bold. This recipe is slightly altered from the original in that I incorporated the instructions for the white chocolate raspberry variation into the text of the original chocolate chunk brownies recipe.
Easy White Chocolate Raspberry Brownies (serves 8-10) When I math this out, I get 24 brownies, which at 2-3 brownies per person means either this serves way more people or someone is FINALLY incorporating actual consumption into serving size here.
1/2 cup plus 2 tablespoons boiling water Boil the water, then measure. If you’re a scale baker like I am, it’s 5 ounces.
2 ounces unsweetened baking chocolate, chopped fine Half a Baker’s bar. I use a serrated knife to chop chocolate. The teeth of the knife seem to move more gently through the bar, if that makes sense. All I know is that it’s quieter and I end up with less chocolate on my counter than with a regular knife.
1/3 cup (1 ounce) Dutch-processed cocoa powder
2 1/2 cups (17.5 ounces) sugar
1/2 cup plus 2 tablespoons vegetable oil
2 large eggs plus 2 large yolks
4 tablespoons unsalted butter, melted
2 teaspoons vanilla extract
1 3/4 cups (8.75 ounces) all-purpose flour
3/4 teaspoon salt
1 cup white chocolate chips
1/3 cup raspberry jam I used 3 tablespoons because that’s what I had. Peanut isn’t a big fruit fan so that works out for us too.
Adjust oven rack to lowest position and heat oven to 350 degrees. Make foil sling for 13 by 9 inch baking pan by folding 2 long sheets of aluminum foil; first sheet should be 13 inches wide and second sheet should be 9 inches wide. By the time I reached the semicolon I knew I would be skipping this step. Lay sheets of foil in pan perpendicular to each other, with extra foil hanging over edges of pan. Push foil into corners and up sides of pan, smoothing foil flush to pan. Spray foil with vegetable oil spray. My trusty Baker’s recipe says to just line the pan with foil and spray it. One sheet of foil. 2 steps. No semicolon. I took the easy way.
Whisk boiling water, unsweetened chocolate, and cocoa in a large bowl until chocolate is melted. Whisk in sugar, oil, eggs and yolks, melted butter, and vanilla until just combined. Gently whisk in flour and salt until just incorporated. Stir in white chocolate chips. I added the chips just before the flour was incorporated. Since we’re trying not to over mix the flour, I figured a few stirs could be saved by adding the chips earlier.
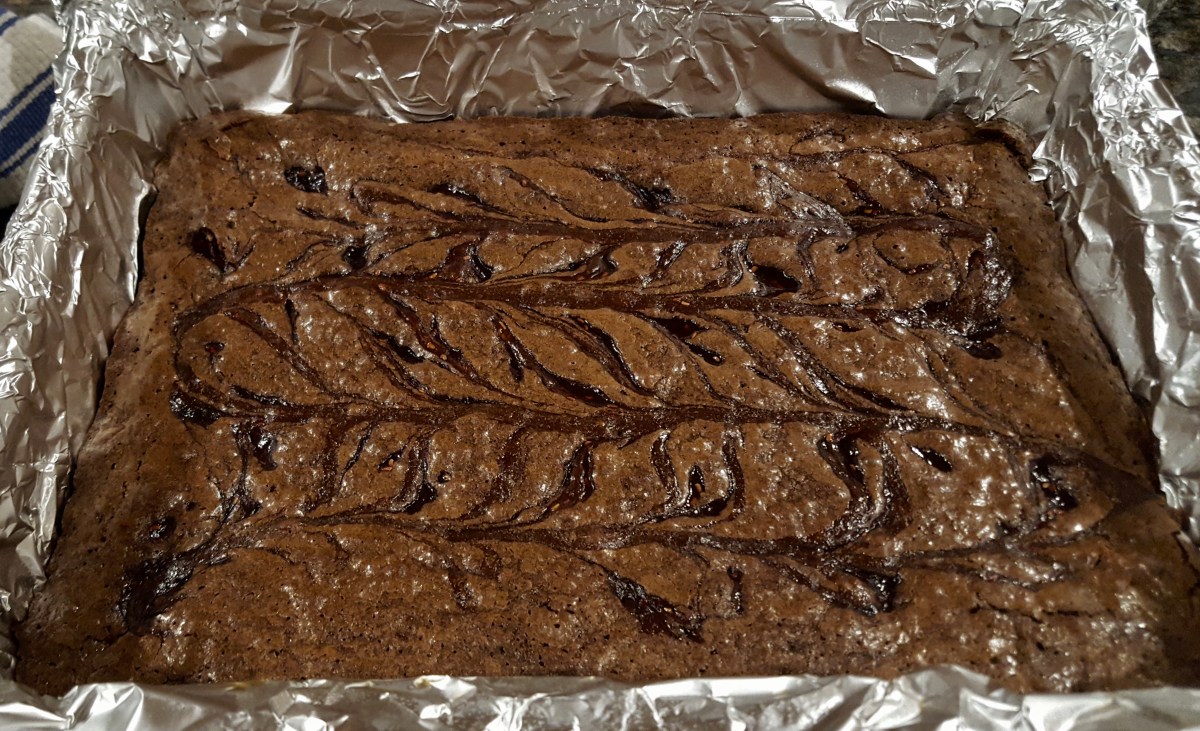
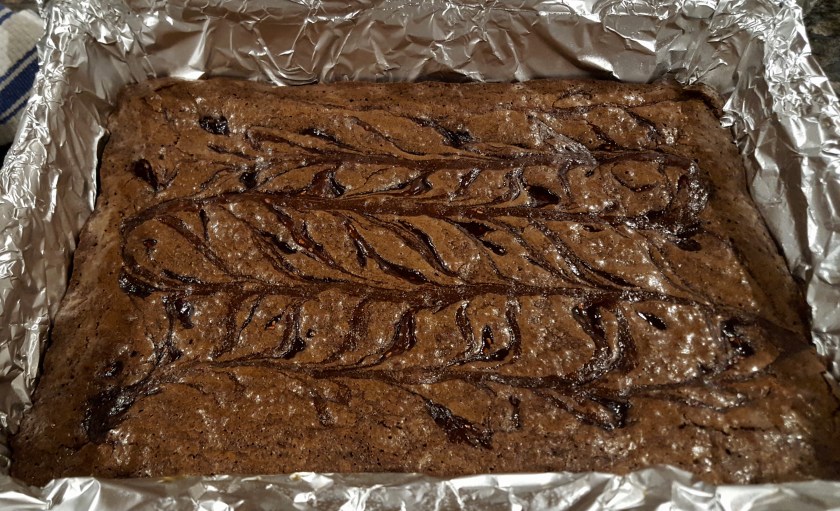
Transfer batter to prepared pan. Dollop jam evenly over top of batter and swirl into batter with the tip of a paring knife. Bake until toothpick inserted in center comes out with a few moist crumbs attached, 30-35 minutes, rotating pan halfway through baking. Totally forgot to do this. Rotated at 30 since it took 35. Transfer pan to wire rack and let cool for 1 1/2 hours.
Using foil overhang, lift brownies out of pan. Return brownies to wire rack and let cool completely, about 1 hour. Cut into 2-inch squares and serve. 2 inch squares. From a 9-inch by 13-inch rectangle. My inner control freak will have to be appeased by getting the extra inch from each side all to myself.
There are three more variations: Nutella-Hazelnut, Chocolate-Mint, and Peanut Butter-Marshmallow, plus the original recipe in the magazine. If you happen to come across it at the store, it might be worth picking up! I also recommend the Fried Brussels Sprouts.
This blog was launched on a resolution, my first in years (decades?), and is a great reminder of why I stopped doing resolutions. Life changes in a year. Life changes in a few hours with kids at home. I was going at a good clip until June, when my delicately balanced house of parenting/wifing/working cards caught a little breeze and came crashing down. The details aren’t that interesting or important, but it was ONE appointment that essentially set (and then upset and reset) our entire summer schedule.
I’m pretty sure I tried (at least) 52 new recipes last year, but I didn’t keep track of them that well or share many at all, so I readily admit that failure. I over-promised and under-delivered. The former business consultant in me is deeply disappointed.
I’m going to keep cooking and sharing (when time and interest allows) and maybe writing about not cooking stuff, too. If at first you don’t succeed, change the parameters to increase the odds next time!
We finished the Christmas cookies last night. Before Christmas, I baked 4 types of cookies (Nutella thumbprints, sugar cutouts, chocolate shortbreads, and gingersnaps), a panettone, a panforte, and made horribly sticky cornflake “wreaths” with Peanut and Meatball (perhaps “roundish wads of sprinkleglop” is a better descriptor). This was down from my usual production of at least 6 types of cookie (Rangers and white chocolate cranberry oatmeal got passed over this year), the aforementioned Italian confections, and German Stollen and a traditional English fruitcake (don’t start, my fruitcake is delicious). We travelled this year and I just didn’t want it all sitting around while we were gone. Because I skipped the fruitcakes and had to buy some additional ingredients for the other stuff, I found myself sitting on an apocalypse-ready cache of dried fruit and nuts. Granola basically staring me in the face, I found a “Basic Granola Recipe” on chowhound and used it to make what I’m calling Tenth Day of Christmas Granola (it will have all the Lords a-Leaping!). Just like last year, my notes on the original recipe are in bold.
3 cups rolled oats (not instant) The cheapest rolled oats at our local grocery were thick cut (from Bob’s Red Mill). I figured granola isn’t something that needs to be delicate or tender so I went for it, and I think it may have helped the oats to not burn like they often have when I have previously made granola.
3 tablespoons packed light brown sugar This seemed like a lot in addition to the honey, so I used 1 tablespoon of turbinado sugar (it was the most accessible sugar in the cabinet. I’m really scientific about all of this.)
1/2 teaspoon ground cinnamon
1/4 teaspoon kosher salt I used pink salt because ours is much finer than kosher and I wanted more even distribution (see? science!)
1/3 cup honey
1/4 cup vegetable oil Canola is my flavor-neutral, high smoke point oil of choice, so I used that.
1 teaspoon vanilla extract Because I was using hazelnuts and a fruit blend, I went with 1/2 teaspoon each of orange and vanilla extract.
1/2 cup small-dice dried fruit I used a whole cup of King Arthur Flour’s Fruitcake Blend, which is raisins, cranberries, dates, currants, and pineapple.
1/2 cup coarsely chopped raw or toasted nuts or seeds I used about 3/4 cup of chopped raw hazelnuts.
Heat the oven to 300°F and arrange a rack in the middle.
Place the oats, brown sugar, cinnamon, and salt in a large bowl and stir to combine; set aside. I also added the nuts and fruit here. I wasn’t too worried about the fruit burning and I wanted the raw nuts to toast with the granola.
Place the honey, oil, and vanilla in a small bowl and stir to combine. Pour over the oat mixture and mix until the oats are thoroughly coated. My honey was crystallized almost solid, so I microwaved the honey and oil together before stirring in the extracts.
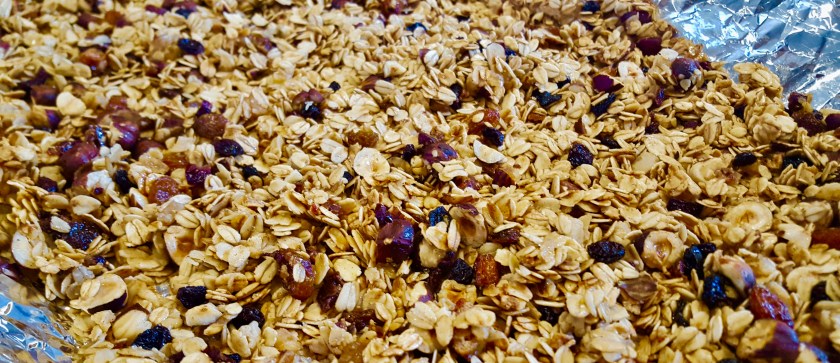
Spread the mixture in a thin, even layer on a rimmed baking sheet. Save clean up, use a foil-lined rimmed baking sheet! Bake for 15 minutes, then stir and continue baking until the granola is very light golden brown, about 5 to 15 minutes more. Despite having nearly twice the volume because of the added fruit and nuts, I was able to easily fit everything onto a half sheet pan and it cooked in the same time.
Place the baking sheet on a wire rack and cool the granola to room temperature, stirring occasionally, about 20 minutes. (Note: It will harden as it cools.) I kind of got to typing this and forgot to stir. Things got sticky and it took a little more effort than maybe it could have to get things moving once they had set, but it still worked out and then I didn’t have to worry about step 6 because it was already all together.
Add the fruit and nuts or seeds to the baking sheet and toss to combine.Store the granola in an airtight container for up to 2 weeks. 2 weeks? Not necessary, this will be lucky to make it through the Epiphany.
So there it is, and the results are exactly what I was looking for; the fruit is chewy, the oats are nice and crispy, the hazelnuts are toasty and crunchy, and it’s not overly sweet. The cinnamon and orange are magical together. I have some slivered almonds and dried cherries for my next batch, which I’ll probably do with almond extract. I also want to try pistachios and apricots (with ginger instead of cinnamon?), or pecans and dates (maybe with maple syrup in place of some of the honey). I love recipes like this that can be made differently every time.
I can’t (okay, WON’T) commit to timing on future posts. Under-promise and over-deliver is my plan for 2018. #whatevergetsdonein2018
Hello, my name is Melissa, and I have a banana problem.
Bananas are pretty widely recognized as a family-friendly food. They’re sweet and nutritious and soft enough for even the toothless little ones to enjoy. For parents, they come in their own biodegradable wrappers and leave no container left to be transported home. I enjoy them in smoothies or alone after a workout, and Wombat will occasionally take one in his lunch when reminded that we have them. Our boys, however, will consume them in only one way: baked into a sugar-laced dessert going undercover under the moniker “banana bread”, and Peanut will only eat that if it contains chocolate chips.
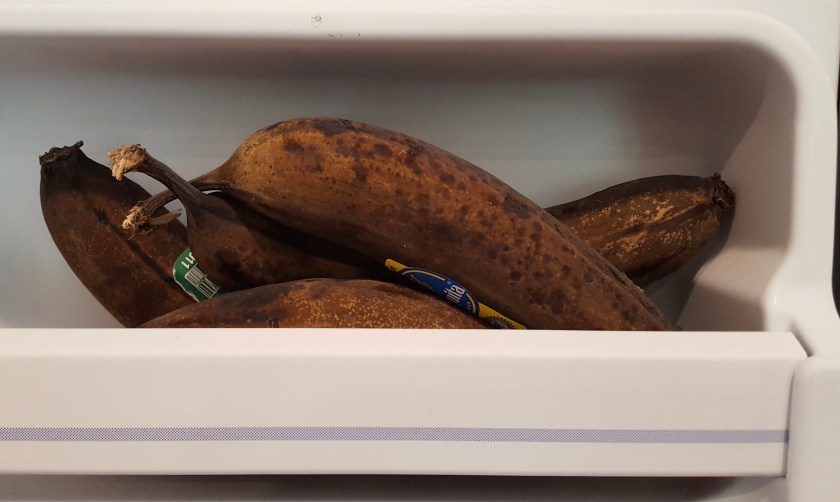
The thing is, I routinely forget that my family doesn’t rapidly devour bananas. I buy them regularly, extra when they’re on sale, and nobody eats them. Which brings me to the 13 (!) bananas in my freezer. I need to use them because we also like to use the freezer for storing not bananas, and that’s becoming impossible.
While sifting through my Pinterest boards for banana-consuming recipes, I came across one I had pinned ages ago for Coconut Banana Bread with Lime Glaze. I had probably put off making it way back when because Wombat hates coconut, Peanut hates coconut, and Meatball wasn’t eating enough to keep me from consuming an entire loaf of bread alone. Meatball has been living up to his nickname lately and I was curious to see if Wombat loves lime more than he hates coconut (he doesn’t, more on that later). I made this recipe pretty much as written with the exception of the sweetened coconut, which I did not have. I happily substituted unsweetened coconut since I often find banana bread to be cloyingly sweet, and this already has the ripe bananas PLUS a cup of sugar for sweetness (PLUS glaze).
Coconut Banana Bread with Lime Glaze (12 servings) from Cooking Light. Notes in bold, as always.
2 cups all-purpose flour (about 9 ounces)
3/4 teaspoon baking soda
1/2 teaspoon salt
1 cup granulated sugar
1/4 cup butter, softened
2 large eggs
1 1/2 cups mashed ripe banana (about 3 bananas) it was 4 bananas for me
1/4 cup plain low-fat yogurt I used low-fat greek style. It’s what I had.
3 tablespoons dark rum We didn’t have dark rum so I used spiced rum.
1/2 teaspoon vanilla extract
1/2 cup flaked sweetened coconut I used unsweetened coconut.
1 1/2 tablespoons fresh lime or lemon juice If you use lemon, you can’t call it Coconut Banana Bread with Lime Glaze.
Preheat oven to 350°.
Lightly spoon flour into dry measuring cups; level with a knife. If you’re reading this, odds are you’ve interacted with dry ingredients at least once in your life and didn’t need this spelled out for you. Combine flour, baking soda, and salt, stirring with a whisk. Or this little stirring tidbit. I also stirred in the coconut here to prevent overmixing later.
Place granulated sugar and butter in a large bowl; beat with a mixer at medium speed until well blended. Add eggs, 1 at a time, beating well after each addition. Add banana, yogurt, rum, and vanilla; beat until blended. Add flour mixture; beat at low speed just until moist. Stir in 1/2 cup coconut. With the coconut incorporated into the dry ingredients, I saved some extra stirring here. Overmixing is the enemy of a tender quick bread. Spoon batter into a 9 x 5-inch loaf pan coated with cooking spray; sprinkle with 1 tablespoon coconut. Bake at 350° for 1 hour or until a wooden pick inserted in center comes out clean. Cool in pan 10 minutes on a wire rack; remove from pan. Combine powdered sugar and juice, stirring with a whisk; drizzle over warm bread. Cool completely on wire rack.
Meatball loved this bread. He calls it “Glaze Bread” and saves the sweet lime top for last. I also loved this bread. It was delicious as a snack or breakfast. There ends the family’s love for this bread. Wombat smelled the lime, dug in, then looked at me like a wounded animal and said accusingly (with his mouth full), “You didn’t tell me about the coconut.” So I went back to the drawing board, eliminating the coconut and upping the lime. I added zest to both the bread and the glaze and added juice to the bread. Knowing the coconut also provided a textural element to the bread, I though about adding nuts, but the only suitable nut for lime in my mind is macadamia, and we didn’t have those, so I decided to go for a poppyseed-type addition: chia seeds. I added 2 tablespoons but would definitely use more, probably a full quarter cup, next time. Bonus nutrition points there, too!
Glazed Lime Banana Bread with Chia
2 cups all-purpose flour (about 9 ounces)
3/4 teaspoon baking soda
1/2 teaspoon salt
2 tbsp chia seeds (can be up to doubled)
1 cup granulated sugar
1/4 cup butter, softened
2 large eggs
1 1/2 cups mashed ripe banana (3-4 bananas)
1/4 cup plain low-fat yogurt
Juice and zest of 1 lime plus rum to make 3 tablespoons of liquid
1/2 teaspoon vanilla extract
Cooking spray
1/2 cup powdered sugar
1 1/2 tablespoons fresh lime juice
zest of 1 lime
Preheat oven to 350°.
Combine flour, baking soda, salt and chia seeds.
Beat sugar and butter together until well blended. Add eggs, 1 at a time, beating well after each addition. Add banana, yogurt, lime juice and zest, rum, and vanilla; beat until blended. Add flour mixture; beat at low speed just until moist. Spoon batter into a 9 x 5-inch loaf pan coated with cooking spray. Bake at 350° for 1 hour or until a wooden pick inserted in center comes out clean. Cool in pan 10 minutes on a wire rack; remove from pan. Combine powdered sugar, zest, and juice, stirring with a whisk; drizzle over warm bread. Cool completely on wire rack.
This one was a winner all around (even without chocolate chips!), though Wombat said he would have liked walnuts in it (That’s something he’s going to have to make for himself). That didn’t stop him from making a sad face the day he came home from work and the kids had finished the loaf. Meatball still saved the glaze for last.
Update: I was so proud of myself for using up several bananas for this entry, I felt like I was on the podium for the Adulting Olympics. A week later, while making room for some tomato sauce, I found SEVEN more bananas in the back of the freezer, which meant I had a dozen bananas still stored (sad trombone sound). At publication (two cakes and a loaf of bread later), we are down to four bananas in the freezer. And one in the fruit bowl. It’s past ripe and will be in the freezer before dinner.
On Friday morning, St Patrick’s Day, Peanut and Meatball were all over the place. On the average morning, they race downstairs, find me at the kitchen table and immediately fight over who gets to put in his breakfast order first (not that they need to order, they eat the EXACT same thing every morning), but Friday, they were opening doors and looking under chairs and Mommy was confused. They were searching for evidence of a leprechaun.
When did leprechauns start harassing us at home?
When I was a kid, St Patricks Day was when we wore green. Full stop. Maybe we got shamrock stickers on a good year. In the *mumble mumble* decades since then, SOMEONE (I’m looking at you, Pinterest) has decided that childhood can’t have enough magic and now the leprechaun comes into our homes and keeps Mommies up at night trying to outdo each other. Somehow, I had NO IDEA, but was able to scrape one together pretty quickly. Fortunately, Peanut had put on a blue shirt and Meatball wasn’t even dressed yet, so I sent them up to change and get dressed while I frantically shook some green food coloring into the partial gallon of milk in the fridge. A recent windstorm helped convince them that before turning our milk green, the leprechaun also threw one of our patio chairs into the woods. They ran with it and reasoned that he couldn’t get in at night, got mad and messed up the furniture, then snuck in that morning when Wombat let the dog out. St Patty’s Day was saved, but seriously, WHY IS THIS A THING NOW? Also, Peanut wouldn’t drink the green milk, in case the leprechaun was trying to poison us. His exact quote: “I’m not sure the magic is safe for people to drink.” So, thanks, leprechaun (still looking at you, Pinterest).
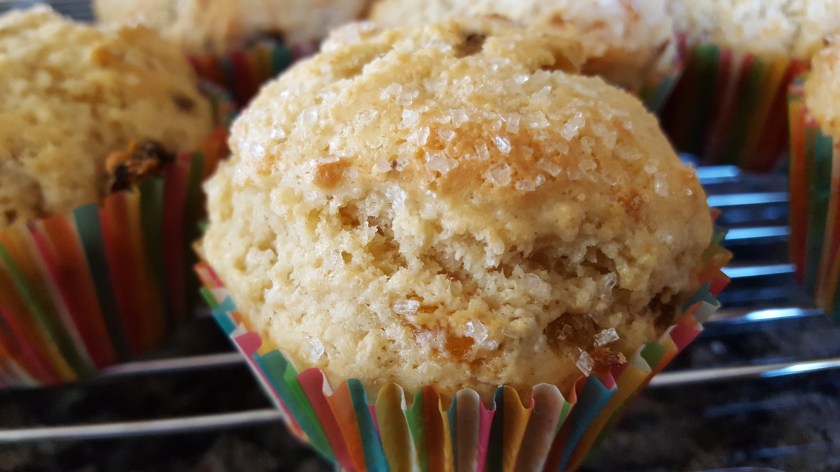
Before we cooked our corned beef and cabbage, Meatball helped me make an accompaniment, Irish Soda Bread Muffins. I’ve made soda bread most years, the typical americanized version with caraway and currants in a round pan. I’ve tried a few recipes, and they’ve all been similar in flavor and dense, scone-like texture. Because data-mining algorithms are incredible, this muffin recipe from King Arthur Flour popped up in the ad bar of my Facebook feed Thursday night. I had planned to stop at the grocery Friday morning anyway, so adding currants to my list was a no-brainer.
Currants do not exist in Leonardtown, Maryland.
There are two groceries near the gym, so Meatball and I went shopping right after my workout. Two groceries and a liquor store (for Guinness, because priorities) later, still currant-less, I was lightheaded, grumpy, and eyeing the McDonald’s drive-thru, so we gave up on the quest for currants and used golden raisins instead. I chopped them up so they’d be distributed more like the smaller currants, and Friday was the first time either boy has happily consumed a baked item containing dried fruit of any kind! In fact, the entire batch was gone before lunch on Sunday, and only lasted that long because we wouldn’t let them eat 3 muffins each on Saturday. 8 thumbs up; forgot to get a yum scale reading from Peanut. These are much lighter in texture (like typical muffins) than my previous soda breads, and they also didn’t dry out as quickly. The recipe makes 12 muffins, which is a manageable quantity. Many recipes fill two 9″ pans; I’ve thrown out surplus soda bread more than once.
My notes are in bold as always. This recipe was pretty straightforward and like all King Arthur Recipes, clear and concise, so I didn’t have much to add. If you go to the website, you can get the ingredient list by weight as well (which is what I use, because it’s more precise and eliminates having to wash measuring cups).
Irish Soda Bread Muffins
Ingredients
1 1/2 cups King Arthur Unbleached All-Purpose FlourIt doesn’t have to be King Arthur, though that’s what I have used exclusively for years, and it’s pretty widely available.
2 teaspoons baking powderI use aluminum-free baking powder.
1/4 teaspoon baking soda
1/2 teaspoon salt
1/3 cup granulated sugar
1 1/2 cups currants (first choice) or raisins Golden raisins for us, the only dried fruit everyone will reliably eat.
1/2 to 2 teaspoons caraway seeds, to taste I used only a teaspoon this time, but will use 2 teaspoons next go-round.
1 large egg
1 cup buttermilk, yogurt, or sour cream I didn’t have quite as much buttermilk on hand as I thought, so I augmented with yogurt.
6 tablespoons butter, melted; or 1/3 cup vegetable oil I don’t know why you’d not use butter where it’s an option.
sparkling white sugar, for topping Sparkling white sugar is very pretty and makes a nice glittery crust atop the muffins, but table sugar would also work, though the crust will be finer and more subtle. Raw sugar is another option, with the coarseness of the sparkling sugar but not as, well, sparkly.
Instructions
Preheat the oven to 400°F. Lightly grease a standard muffin pan; or line with papers, and grease the papers. I never greased muffin papers before reading it as an instruction in the Bread Bible. It really does make a difference in removing the papers from finished muffins. Completely worth the extra few seconds to do it. Rainbow muffin papers aren’t required, but Meatball thought they would be nice for St Patrick’s Day (I had forgotten we even had them. He’s such a good little pantry forager.)
In a medium-sized mixing bowl, whisk together the flours, baking powder, baking soda, salt, sugar, currants or raisins, and caraway seeds.
Mixing dry ingredients is Meatball’s jam.
In a separate bowl, whisk together the egg, buttermilk (or equivalent) and melted butter (or equivalent).
Quickly and gently combine the dry and wet ingredients; honestly, this won’t take more than a few stirs with a bowl scraper or large spoon. As soon as everything is evenly moistened, quit; further stirring will cause the muffins to be tough. Overmixing danger is real, but it’s worth doing one more turn along the bottom of the bowl. What’s worse than overmixed batter? A pocket of completely dry flour.
Spoon the batter into the prepared pan, filling the cups about 3/4 full; the stiff batter will look mounded in the cups. I used my 1/3(ish) cup disher and overfilling the disher just slightly was the perfect amount for each muffin. Top with sparkling white sugar, if desired.
Bake the muffins for 20 minutes, until a cake tester inserted into the center of a muffin comes out clean. Remove them from the oven. Tip the muffins in the pan, so their bottoms don’t get soggy. This means pop them up and set them still in the tin on their edges to let the steam escape. They’ll be screaming hot, so if you’ve not yet developed asbestos-tipped baker’s fingers, use a skewer or thin spatula to lift them.Wait 5 minutes, then transfer the muffins to a rack to cool. Serve them plain, or with butter and/or jam. We enjoyed ours with Irish butter. I’d love to say I bought it special for the occasion, but we just eat (copious amounts of) Irish butter around here.
3.14 (159…) is significant when you are a proud member of the geek tribe and married to their king. When I told Wombat I was making a pie for Pi Day, March 14 (yesterday), he asked me what time? The correct answer is 1:59. Because geometry.
Finding a new recipe for Pi Day was a challenge because I’ve made a few pies in my day. Every Thanksgiving I make a pumpkin pie (Wombat’s favorite – I think I have 3 different pumpkin pies in my repertoire now) and then in years when we’ve had many guests (our record is 22), I’ve made a second pie, and I never repeat a second pie. We’ve had chocolate cream, chocolate espresso pecan, apple cider cream, classic apple, Marcus Samuelsson’s Black-Bottom Peanut Pie (OMG), buttermilk chess pie, and I think lemon meringue one year. In season, I like to make blueberry pie or pre-make the filling to enjoy when blueberries aren’t as plentiful, but March is not a great time to find seasonal fruit. I went to an old standby, The Joy of Cooking (Wombat calls it The Tome), looking for inspiration. The Ohio Lemon Pie jumped out at me, primarily because the first 24 of my undisclosed number of years on this earth were spent in Ohio and I had NEVER heard of it. The reason became clear: without a mandolin slicer and a food processor, this pie would be prohibitively labor intensive. I did not own either of these things until well into my 27th year, so, boom.
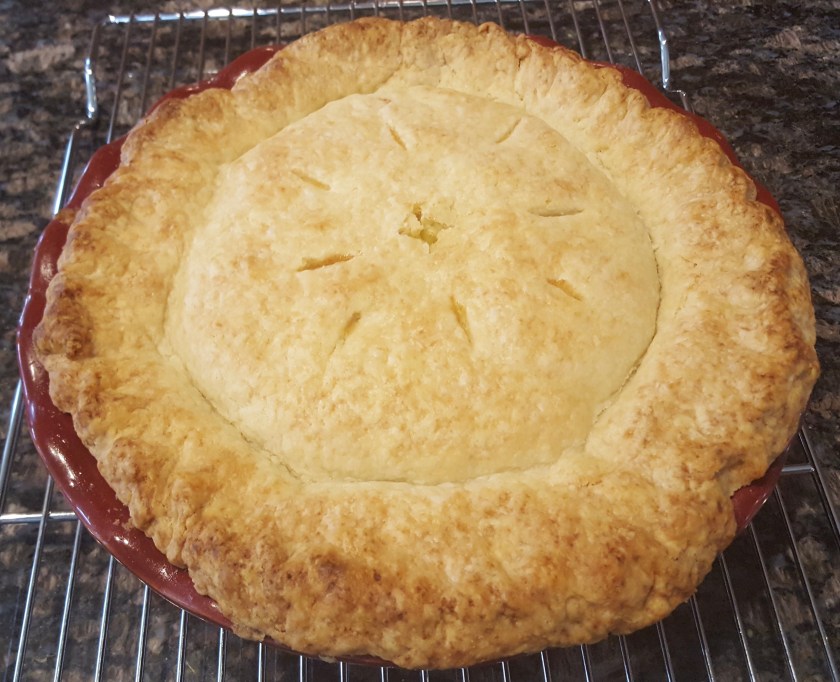
This pie is intensely lemony. Like lemon drop candy plus lemon marmalade plus lemon curd with lemon juice and limoncello lemony. I used a standby butter pastry crust and the rich flavor and flaky texture really contrast the dense, tart, lemoniness of the filling. No whipped cream, ice cream, or other accoutrements are necessary. The filling contains sliced whole lemons, peel, pith, and all, and I must admit the “no waste” idea appealed to me. What surprised me was that the pith, which I expected to be tough and bitter, wasn’t unpleasant, as it softened nicely after 24 hours of macerating in sugar and the lemons’ own juice. The membrane between the segments, however, remained as tough as ever, was nearly impossible to slice through, and made for some messy plates. Making this again, I would slice and macerate the lemons per the recipe, then spin the whole lot in the food processor to break up the membrane a bit. I’m curious to try this modified method with other citrus fruits, maybe a lemon-orange combination, lime, or even pink grapefruit. I did not use the crust recipe from Joy, but am excited that this pie gives me an opportunity to share the best crust recipe I’ve ever used and the only one I ever will use again.
5 thumbs up for this one. The boys liked the crust (little butter fiends) so one up from each of them, but I think the texture of the filling threw them both a bit, and it was too tart and lemony for Peanut (Meatball eats lemons straight, so no tartness issues with him). Wombat gave it two thumbs up, and it gets one from me, primarily because the original method made plating it a huge pain and eating it a minor one.
Not pretty. Good thing I’m not superficial.
The flavor, however, was unique and delicious and maybe I had two slices for second breakfast this morning. I taught a class at the gym last evening and I get pre-class jitters, so I didn’t eat much yesterday. This means that today (and any day after I teach a later class), I pretty much rummage mouth-first through the kitchen like a shark-raccoon. Fortunately for my waistline and blood sugar, we don’t always have fresh pie sitting around. The recipe says to bring it to room temperature before serving and/or eating, but I prefer it cold, or maybe I’m just impatient.
Ohio Lemon Pie (Recipe abridged from The Joy of Cooking, my notations in bold)
Prepare:
Flaky Pastry Dough or Deluxe Butter Flaky Pastry Dough See the end of the recipe for the best pie dough recipe ever ever.
Roll half the dough into a 13-inch round, fit it into a 9-inch pie pan and trim the overhanging dough to 3/4 inch all around. Refrigerate. Roll the other half into a 12-inch round for the tip crust and refrigerate it. I don’t know what your fridge situation is like but I do not have this kind of real estate for storing flat, delicate dough. I made the crust the day (almost the moment) I baked the pie. Grate the zest from:
2 large or medium lemons My lemons were medium and I totally spaced on this step, so the zest just went in still attached to the lemon.
Slice the lemons paper thin, removing the seeds as you do so. Mine were more manila-folder thin, maybe even cereal box cardboard thin. In a glass or stainless-steel bowl or ceramic or plastic, just don’t use anything that will corrode because lemons are crazy acidic combine the lemon slices and grated zest (or not) with:
Before macerating
2 cups sugar
1/4 tsp salt
24 hours later
Cover and stand at room temperature for 2-24 hours, stirring occasionally. The longer the lemons macerate, the better. I gave mine the full 24 hours and stirred them maybe 4 or 5 times. Stirring is a great time to catch and remove any seeds missed during slicing.
I started my crust a couple of hours before I was ready to bake. Okay, I started the crust about an hour before I had to pickup Meatball from preschool and then rolled out and chilled the bottom crust before moving on to this step: Position a rack in the lower third of the oven. Preheat the oven to 425. Whisk until frothy:
4 large eggs
Whisk in:
4 Tbsp butter, melted
3 Tbsp all-purpose flour
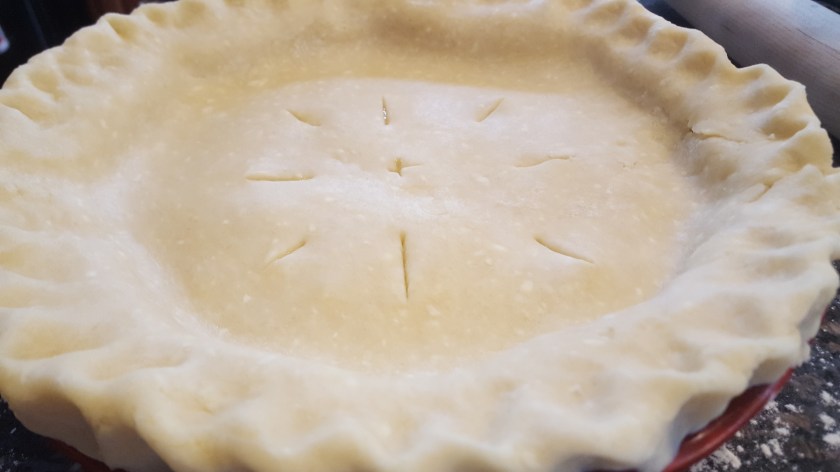
If you plan to process the lemon mixture, do it now. Stir the lemon mixture into the egg mixture. It took quite a bit of stirring to make sure the slices and sugar were evenly distributed. Pour the filling into the bottom crust and level with the back of a spoon. Brush the overhanging crust with cold water. Cover with the top crust, trim (didn’t trim, I like a big crust and more importantly so do the boys) and crimp or flute the edge I use the (very clean) knuckles of my index fingers to flute the edge. Cut steam vents in the top crust (evenly distributed and other than that it doesn’t matter where. I put one in the middle because I knew I’d have to test doneness there) and bake for 30 minutes. Reduce the oven temperature to 350 and bake until a knife inserted in the center comes out clean, 20-30 minutes more . Mine took the full 30. Let cool completely on a rack.
Can you imagine trimming (and trashing) any of that gorgeous buttery crust?
If you have a lab-type dog, secure the pie in the microwave or elsewhere out of reach. The pie can be stored in the refrigerator for up to 2 days but let it warm to room temperature before serving. Or don’t.
I keep a bottle of vodka in my freezer exclusively for pie crust. Here’s a quick shakedown of the science behind it. Gluten gives baked goods structure. In pizza crust, this quality of chewiness is desirable but it makes cakes and pie crusts tough, not tender. Gluten needs water to develop. Minimizing water helps to reduce gluten development, but a dry dough can be impossible to manipulate. Vodka provides moisture for handling but minimal water, so gluten doesn’t form as readily, and the alcohol cooks off without contributing any flavor whatsoever. I assume this is also why the recipe includes shortening, which contains no water, whereas butter is 16-17% water.
The recipe cautions (and I concur) that this can not be successfully made without a food processor.
Halving this recipe will make a single pie shell.
Move the crust from the counter by rolling it gently around the rolling pin, then unroll it right into the pan.
2 1/2 cups all-purpose flour
2 tablespoons sugar
1 teaspoon salt
12 tablespoons unsalted butter, cut into 1/4 inch pieces and chilled
8 tablespoons vegetable shortening, cut into 4 pieces
1/4 cup vodka, chilled
1/4 cup ice water
Process 1 1/2 cups flour, sugar, and salt together in food processor until combined, about 5 seconds. Scatter butter and shortening over top and continue to process until incorporated and mixture begins to form uneven clumps with no remaining floury bits, about 15 seconds.
Scrape down bowl and redistribute dough evenly around processor blade. Sprinkle remaining 1 cup flour per dough and pulse until mixture has broken up into pieces and is evenly distributed around bowl, 4 to 6 pulses. The dough will look like wet playground sand. There will be larger clumps, smaller clumps, and tiny bits. Don’t over process it!
Transfer mixture to a large bowl. Sprinkle vodka and ice water over mixture. I hold back some of the water in this step and usually don’t need all of it. For this pie I had a tablespoon leftover. Stir and press the dough together, using stiff rubber spatula, until dough sticks together.
Divide dough into to even pieces. Turn each piece of dough onto a sheet of plastic wrap and flatten into a 4-inch disk. Wrap tightly and refrigerate for 1 hour. Before rolling out, let it sit on the counter to soften slightly, about 10 minutes. (Dough can be wrapped tightly in plastic and refrigerated for up to two days or frozen for up to one month. Thaw completely before rolling out.) For holidays when I know I’ll be busy as heck in the kitchen, I always make pie crusts in advance.
Wednesday, March 8, 2017 – My husband’s Day Without a Woman is a drive to the airport, a flight to Vegas, and the beginning of an annual boys’ weekend. An educated and intelligent, capable man, he has apparently misinterpreted the point of today. The trip was planned months ago and I am figuring out when I’m going to cash in my own weekend away, but my zen vanished when he asked to have the last cup of coffee before he embarked on his vacation. He lives still because he cooked all weekend and we are still basking in delicious leftovers (Arroz con Pollo and Skillet Calzone).
Wombat (not what his mother named him; you may have noticed I don’t use my family’s real names) wasn’t much of a cook when we met, but early in our relationship he challenged me to a bet (I don’t remember what the bet even was, probably something about sports because he was extremely confident), and the loser had to cook dinner for the winner and watch the movie of his/her choice. I brought over Mary Poppins and he made me chicken Cordon Bleu, lemon asparagus, and Bananas Foster. Turns out we both won because that meal was the beginning of his culinary interest, and now at least two weekends a month, he is working on some new recipe he found in a magazine or online. He has come light years from the guy who left me a voicemail at work wondering where the grocery keeps the lemon zest (“I got lemon peel, lemon pepper, and then a whole regular lemon just in case.”)
As a (mostly) stay at home mom, I haven’t the luxury of taking today off (especially under the circumstances), and with Wednesday being my day with the most kid-free time, abstaining from economic stimulation wasn’t going to happen either. Kids have to eat and we were out of the following this morning: milk, apples, bagels, broccoli, and Frosted Mini Wheats. These are THE foods the boys will reliably eat. If we were also out of butter and baby carrots, starvation would soon follow. I dropped Meatball at preschool and hit two groceries (regular grocery and warehouse store) and spent an undisclosed amount of money on beautiful produce (berries were on sale! so was spinach!) along with the staples on my list. Then I returned home and lovingly shelved and stored all the healthy victuals before digging through the freezer and helping myself to more than a serving of Samoas (I support all women, including future women). I believe it was Julia Child who said “All things in moderation, including moderation” and even if it wasn’t, it’s a damn good way to live.
We are going to have leftovers one last time tonight, and the next two evenings aren’t going to be conducive to experimentation in the kitchen. Do not fret, you are getting a recipe this week! It’s just not a NEW recipe, not to me at least. For at least 3 years now, I have been corning my own beef for St Patrick’s Day. It brines for 10 days and really does blow commercial corned beef out of the water. This year I’m only brining for 9 days because my brisket this year is smaller than in years past and also I forgot. All the time is in the waiting, and there is little additional work, so why not give it a try? I’d lecture here on historical authenticity and cultural preservation, but this isn’t Irish food. Corned beef and cabbage is an American invention, along with what we call Soda Bread. So let’s keep the “ish” in Irish!
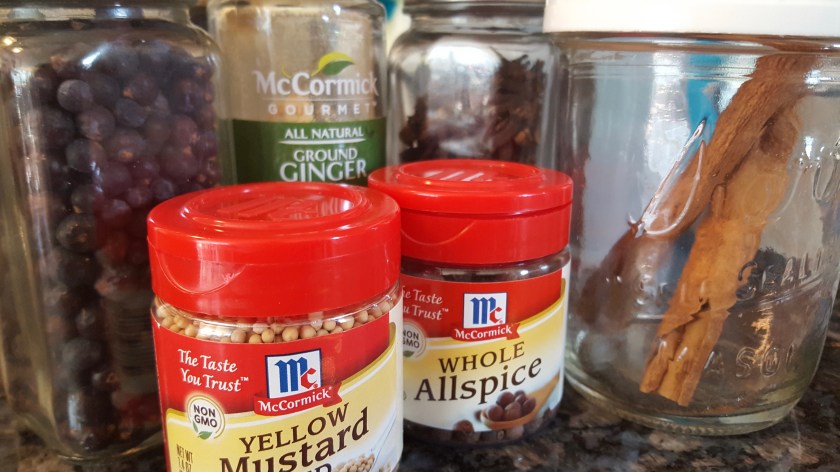
Clockwise from the left: juniper, ginger (duh), cloves, cinnamon, and (obviously) allspice and mustard seeds
Alton Brown (my husband’s original culinary muse, aside from me of course) published this recipe in Good Eats 3 and it can also be found here.
Corned Beef, for Corned Beef and Cabbage
Ingredients
2 quarts water
1 cup kosher salt
1/2 cup brown sugar
2 tablespoons saltpeter Optional and I’ve never used it. It’s primary function is to make the meat pink. I can live without that, especially if it means I don’t have to buy something I know I’ll only use once a year.
1 cinnamon stick, broken into several pieces
1 teaspoon mustard seeds
1 teaspoon black peppercorns
8 whole cloves
8 whole allspice berries
12 whole juniper berries
2 bay leaves, crumbled
1/2 teaspoon ground ginger
2 pounds ice
1 4-5 pound beef brisket trimmed I’ve always used grass-fed beef for this recipe as we buy a quarter or a side annually and have a brisket on hand. I can’t imagine that the flavor would be much different with conventional beef, especially after 10 days in brine. This year’s brisket is much smaller and I’m quite concerned that we won’t have enough leftovers for the accompanying hash recipe, which is heaven.
1 small onion, quartered
1 large carrot, coarsely chopped
1 stalk celery, coarsely chopped
Instructions
Place the water into a large 6 to 8 quart stockpot along with salt, sugar, saltpeter, cinnamon stick, mustard seeds, peppercorns, cloves, allspice, juniper berries, bay leaves and ginger. Cook over high heat until the salt and sugar have dissolved. Remove from the heat and add the ice. Stir until the ice has melted. If necessary, place the brine into the refrigerator until it reaches a temperature of 45 degrees F. Once it has cooled, place the brisket in a 2-gallon zip top bag and add the brine. I have never seen 2 gallon zip-top bags at any market in three states. I have used oven bags in past years but this year I am halving the recipe for my smaller brisket and using a 1 gallon bag. Seal and lay flat inside a container because you do NOT want brine all over the fridge if your bag springs a leak, cover and place in the refrigerator for 10 days. Check daily to make sure the beef is completely submerged and stir the brine. I flip the bag and wiggle it a bit to mix and distribute the brine.
Let the brining begin!
After 10 days, remove from the brine and rinse well under cool water. Place the brisket into a pot just large enough to hold the meat, add the onion, carrot and celery and cover with water by 1-inch. Set over high heat and bring to a boil. Reduce the heat to low, cover and gently simmer for 2 1/2 to 3 hours or until the meat is fork tender. Remove from the pot and thinly slice across the grain.
Tune in next week for Corned Beef and Cabbage. St Patty’s Day is on a Friday, so we even get a dispensation from the Pope this year!
It’s Ash Wednesday, the beginning of Lent, and for Catholics it is also a day of fasting (limiting food intake) and abstinence (no red meat, poultry or alcohol). Our family is what I would call “Cathol-ish”. We are not regular churchgoers, haven’t been since the Extended Deployment and Two Manhattan Christmas of 2013 (a different story for another post), but we do make it on the major holidays. (When my husband was quizzing Peanut on fire safety for Cub Scouts, he asked “What’s something we do twice a year?” Peanut answered enthusiastically “Go to church!” Survey says: Change smoke detector batteries. We gave him partial credit.) The boys go to vacation Bible school every summer and we say grace before dinner every night. We do aim to observe Lenten traditions every year to prepare for Easter (because Peeps and the Resurrection). We didn’t (and won’t) make it to mass today but I did call my husband at work and remind him he can’t eat the leftover Hemingway burger he took in for lunch and haven’t forgotten to abstain from meat myself (yet). That plus the shrimp for dinner (which I did not enjoy with a glass of wine) and the angst I’m having over what to give up is a significant step up from our standard religious effort, and isn’t that mindfulness ultimately the point of Lent? Now let’s get on to the food before this religion talk goes from endearingly honest to irreverently controversial.
Another Nigella recipe here. She writes her recipes with charming and vivid descriptions and anecdotes that make it impossible to not want to try them. This one has been on my radar for a while, but I was in danger of making this blog all about Nigella there for a bit. As it stands now, 3/9 recipes so far are from Simply Nigella. That’s still pretty heavy for a single publication but, dang, she’s just so amazing (I will admit as I transcribe these recipes, I find her comma usage excessive. She’s more than likely correct, but still)! If you want to just go ahead and buy the book, you’d be wise to do so. (I am not compensated for any product recommendations or reviews. I just like telling people what I think about stuff.)
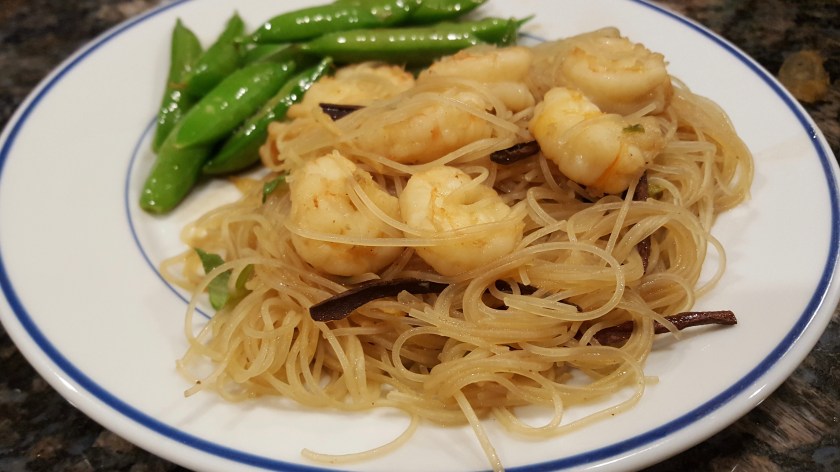
The dish was a hit, and pretty quick to assemble (faster than 30 minutes in only ONE POT!) 7 thumbs up for this one from the family, Meatball offering a single thumb of dissent because he liked the sauce on the shrimp, but not the noodles. His approval of sauce in any form is a huge leap, though, so taking that into consideration, I’m willing to declare this a unanimous win. Peanut rated it 2,026 yums on a scale where pizza (his favorite meal) is 3,000 yums, and completely cleaned his plate while continually declaring how delicious it was. Full disclosure, cinnamon is the predominant flavor. If you don’t care for cinnamon or take issue with flavors you associate with “sweet” in savory dishes, this one’s not for you.
As always, the recipe follows with my notes boldface.
Thai Noodles with Cinnamon and Shrimp (Serves 2)
I doubled this recipe to serve the four of us with 2 smaller servings of leftovers. Quantities below are the originalrecipe for two.
1 Tablespoon vegetable oil
2 cloves garlic, peeled and roughly chopped “Roughly chopped” is my favorite preparation for garlic, which can become rather tedious when you get into directions like “minced”, “sliced”, and “finely chopped”.
1-inch piece fresh ginger, peeled and cut into fine matchsticks Easier than you would think, since most of the cutting goes with the grain of the ginger.
1 star anise
1/2 long or 1 short stick cinnamon, broken into shards
Leafy celery stems. Easy to find if you know where to look!
2-3 leafy stems at the top of 1 celery stalk, stems cut into short lengths, leaves roughly chopped The preface to the recipe explains that this is a geographically necessary substitute for Chinese celery. Buy leafier celery from the grocery and pull off the little branches with leaves on them, or use the leafy stalks near the heart.
1 1/2 Tablespoons light soy sauce
1 tablespoon dark soy sauce I assume this is the same thing as Tamari. It’s what I used with dark soy sauce nowhere to be found (and by nowhere, I mean the one grocery I checked)
1 tablespoon oyster sauce
1/4 teaspoon ground white pepper Normally, I would be a snob about this and insist it be freshly ground, but Nigella herself says to use the pre-ground stuff as that’s what the original chef used. Who am I to argue with authenticity?
7 tablespoons cold water If you’re doubling, it’s 7 ounces.
1 teaspoon chicken broth concentrate
1 tablespoon ketjap manis, or 1 tablespoon dark soy sauce mixed with 1 tablespoon dark brown sugar I confess I didn’t even try to find ketjap manis. There is one grocery store in this county that even has a chance of carrying it, and it was just too far out of the way today. If you have an Asian market near you (lucky!), you’ll probably be able to get it. That said, if this is the only thing you’ll in which you’ll use it, why not use staple ingredients instead?
10 raw shell-off jumbo shrimp, thawed if frozen I was at the warehouse store and the jumbo shrimp was farmed, the wild Gulf shrimp were large. I’m a source snob (sort of. I’ll happily shop at a big box store or the warehouse club but be picky about what I buy there) so I bought the wild shrimp and just weighed out a pound, which is four servings according to the package.
3 ounces mung bean (glass) noodles or rice vermicelli, soaked and drained as per package instructions One package is 5.5 ounces and I learned my lesson on rice noodle quantity making the pho, so I used the slightly smaller amount.
fat pinch ground cinnamon I am guessing that two fat pinches is about 1/8 teaspoon.
fat pinch ground cloves Ditto.
On a high heat, heat the oil in a large wok. We do not own a wok. It’s a “would be nice to have” but having lived this long without one, I think we’ll continue to do so. We do have a deep, curve-sided saucepan that works well in a wok’s stead. You could use any skillet here, I think. Add the garlic, ginger, star anise, cinnamon, and the sliced leafy stems of celery, and cook, stirring, for 1 minute.
Our “not a wok”
Stir in both soy sauces and leave to simmer for 30 seconds, then stir in the oyster sauce and ground pepper. I added the oyster sauce with the soy sauces because I got distracted. Mom problems. Still worked out.
Add the water, followed by the chicken broth concentrate and the ketjap manis (or the mixture of dark soy sauce with dark brown sugar), stir until everything’s well combined, and bring to a boil. It will boil almost instantly so have the shrimp ready.
Now add the shrimp, immersing them in the liquid. Simmer until the shrimp are cooked through. My shrimp being smaller, this didn’t take long at all. 4 minutes, maybe?
Finally, add the drained noodles and stir well – I find a couple of pasta forks, one in each hand, best for this – so that everything is combined, and most of the dark liquid is absorbed. If we have pasta forks, we call them something else. I used a pair of tongs and they worked well for both stirring the noodles and serving the dish. Add the pinches of ground cinnamon and cloves, stir again, and if you’re not serving straight from the wok, decant into a serving bowl and sprinkle with the reserved chopped celery leaves. Save yourself (or in my case your spouse) some cleanup and serve it right from the pan. Also, if you’re serving children, pick out the bits of cinnamon and start anise left behind. It’s tree bark and not very tasty, and I’m not sure how well the body digests it.
Cool leftovers, then cover and refrigerate within 2 hours of making. Will keep for up to 2 days. Delicious cold. I can’t verify how these taste cold but I have a hard time imagining them being anything short of delicious.

 Here’s a sneak peek.
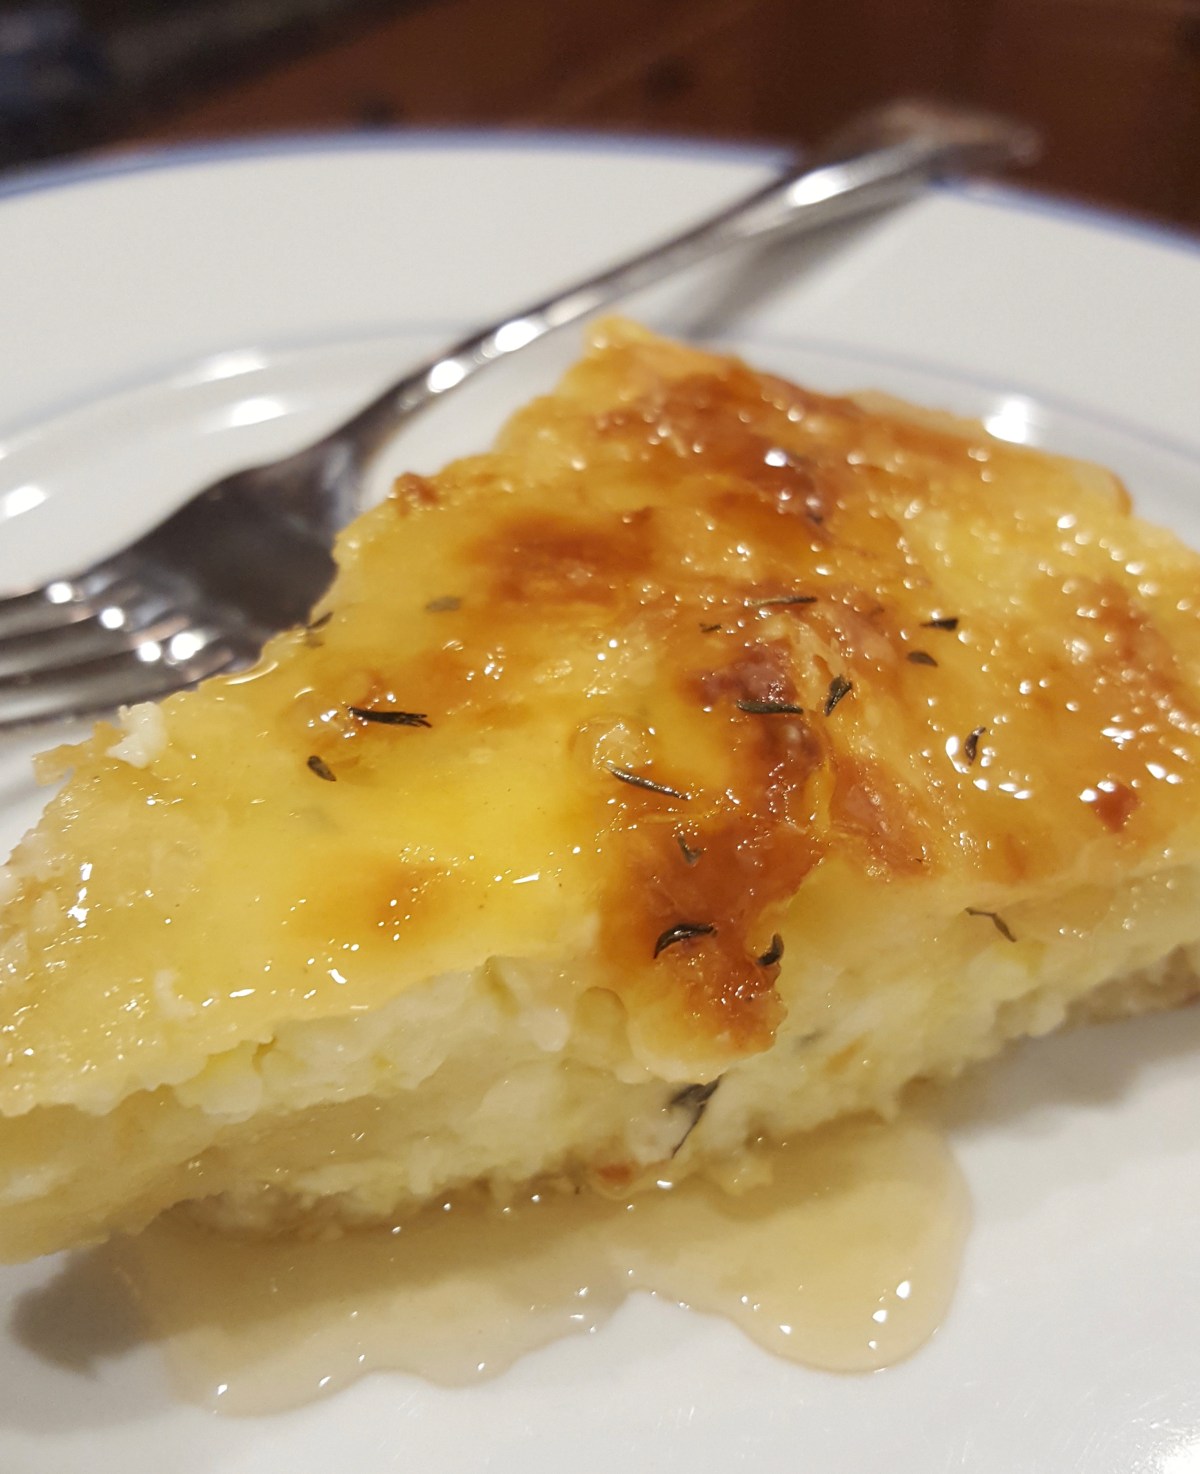


 On Friday morning, St Patrick’s Day, Peanut and Meatball were all over the place. On the average morning, they race downstairs, find me at the kitchen table and immediately fight over who gets to put in his breakfast order first (not that they need to order, they eat the EXACT same thing every morning), but Friday, they were opening doors and looking under chairs and Mommy was confused. They were searching for evidence of a leprechaun.
 Wait 5 minutes, then transfer the muffins to a rack to cool. Serve them plain, or with butter and/or jam. We enjoyed ours with Irish butter. I’d love to say I bought it special for the occasion, but we just eat (copious amounts of) Irish butter around here.
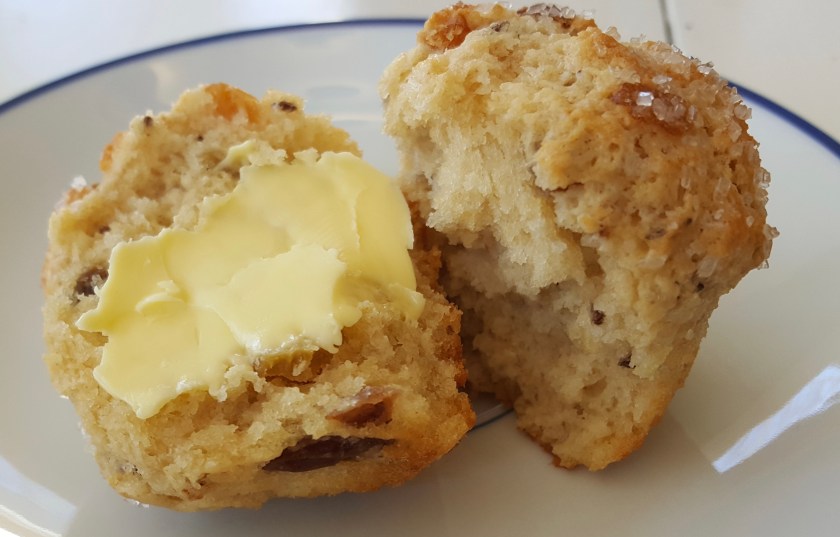
 3.14 (159…) is significant when you are a proud member of the geek tribe and married to their king. When I told Wombat I was making a pie for Pi Day, March 14 (yesterday), he asked me what time? The correct answer is 1:59. Because geometry.


 Cut steam vents in the top crust (evenly distributed and other than that it doesn’t matter where. I put one in the middle because I knew I’d have to test doneness there) and bake for 30 minutes. Reduce the oven temperature to 350 and bake until a knife inserted in the center comes out clean, 20-30 minutes more . Mine took the full 30. Let cool completely on a rack.