Hello, my name is Melissa, and I have a banana problem.
Bananas are pretty widely recognized as a family-friendly food. They’re sweet and nutritious and soft enough for even the toothless little ones to enjoy. For parents, they come in their own biodegradable wrappers and leave no container left to be transported home. I enjoy them in smoothies or alone after a workout, and Wombat will occasionally take one in his lunch when reminded that we have them. Our boys, however, will consume them in only one way: baked into a sugar-laced dessert going undercover under the moniker “banana bread”, and Peanut will only eat that if it contains chocolate chips.
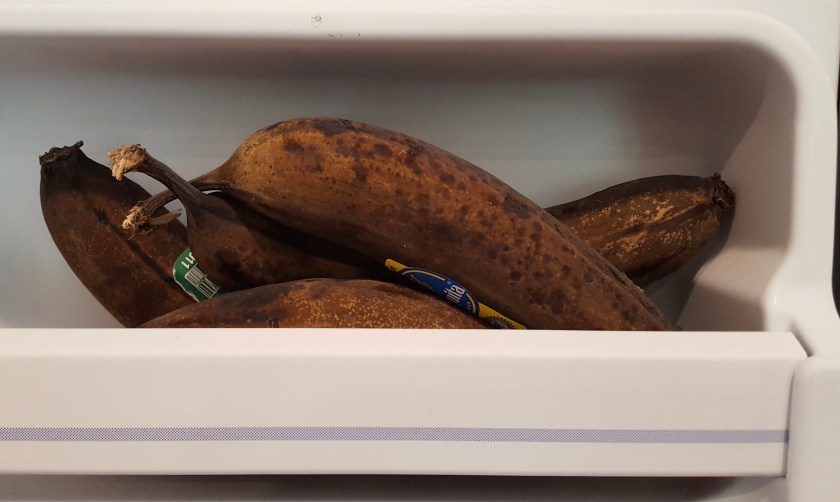
The thing is, I routinely forget that my family doesn’t rapidly devour bananas. I buy them regularly, extra when they’re on sale, and nobody eats them. Which brings me to the 13 (!) bananas in my freezer. I need to use them because we also like to use the freezer for storing not bananas, and that’s becoming impossible.
While sifting through my Pinterest boards for banana-consuming recipes, I came across one I had pinned ages ago for Coconut Banana Bread with Lime Glaze. I had probably put off making it way back when because Wombat hates coconut, Peanut hates coconut, and Meatball wasn’t eating enough to keep me from consuming an entire loaf of bread alone. Meatball has been living up to his nickname lately and I was curious to see if Wombat loves lime more than he hates coconut (he doesn’t, more on that later). I made this recipe pretty much as written with the exception of the sweetened coconut, which I did not have. I happily substituted unsweetened coconut since I often find banana bread to be cloyingly sweet, and this already has the ripe bananas PLUS a cup of sugar for sweetness (PLUS glaze).

Coconut Banana Bread with Lime Glaze (12 servings) from Cooking Light. Notes in bold, as always.
- 2 cups all-purpose flour (about 9 ounces)
- 3/4 teaspoon baking soda
- 1/2 teaspoon salt
- 1 cup granulated sugar
- 1/4 cup butter, softened
- 2 large eggs
- 1 1/2 cups mashed ripe banana (about 3 bananas) it was 4 bananas for me
- 1/4 cup plain low-fat yogurt I used low-fat greek style. It’s what I had.
- 3 tablespoons dark rum We didn’t have dark rum so I used spiced rum.
- 1/2 teaspoon vanilla extract
- 1/2 cup flaked sweetened coconut I used unsweetened coconut.
- Cooking spray
- 1 tablespoon flaked sweetened coconut Unsweetened again.
- 1/2 cup powdered sugar
- 1 1/2 tablespoons fresh lime or lemon juice If you use lemon, you can’t call it Coconut Banana Bread with Lime Glaze.
-
Preheat oven to 350°.
-
Lightly spoon flour into dry measuring cups; level with a knife. If you’re reading this, odds are you’ve interacted with dry ingredients at least once in your life and didn’t need this spelled out for you. Combine flour, baking soda, and salt, stirring with a whisk. Or this little stirring tidbit. I also stirred in the coconut here to prevent overmixing later.
-
Place granulated sugar and butter in a large bowl; beat with a mixer at medium speed until well blended. Add eggs, 1 at a time, beating well after each addition. Add banana, yogurt, rum, and vanilla; beat until blended. Add flour mixture; beat at low speed just until moist. Stir in 1/2 cup coconut. With the coconut incorporated into the dry ingredients, I saved some extra stirring here. Overmixing is the enemy of a tender quick bread. Spoon batter into a 9 x 5-inch loaf pan coated with cooking spray; sprinkle with 1 tablespoon coconut. Bake at 350° for 1 hour or until a wooden pick inserted in center comes out clean. Cool in pan 10 minutes on a wire rack; remove from pan. Combine powdered sugar and juice, stirring with a whisk; drizzle over warm bread. Cool completely on wire rack.
Meatball loved this bread. He calls it “Glaze Bread” and saves the sweet lime top for last. I also loved this bread. It was delicious as a snack or breakfast. There ends the family’s love for this bread. Wombat smelled the lime, dug in, then looked at me like a wounded animal and said accusingly (with his mouth full), “You didn’t tell me about the coconut.” So I went back to the drawing board, eliminating the coconut and upping the lime. I added zest to both the bread and the glaze and added juice to the bread. Knowing the coconut also provided a textural element to the bread, I though about adding nuts, but the only suitable nut for lime in my mind is macadamia, and we didn’t have those, so I decided to go for a poppyseed-type addition: chia seeds. I added 2 tablespoons but would definitely use more, probably a full quarter cup, next time. Bonus nutrition points there, too!
- 2 cups all-purpose flour (about 9 ounces)
- 3/4 teaspoon baking soda
- 1/2 teaspoon salt
- 2 tbsp chia seeds (can be up to doubled)
- 1 cup granulated sugar
- 1/4 cup butter, softened
- 2 large eggs
- 1 1/2 cups mashed ripe banana (3-4 bananas)
- 1/4 cup plain low-fat yogurt
- Juice and zest of 1 lime plus rum to make 3 tablespoons of liquid
- 1/2 teaspoon vanilla extract
- Cooking spray
- 1/2 cup powdered sugar
- 1 1/2 tablespoons fresh lime juice
- zest of 1 lime
Preheat oven to 350°.
Combine flour, baking soda, salt and chia seeds.
Beat sugar and butter together until well blended. Add eggs, 1 at a time, beating well after each addition. Add banana, yogurt, lime juice and zest, rum, and vanilla; beat until blended. Add flour mixture; beat at low speed just until moist. Spoon batter into a 9 x 5-inch loaf pan coated with cooking spray. Bake at 350° for 1 hour or until a wooden pick inserted in center comes out clean. Cool in pan 10 minutes on a wire rack; remove from pan. Combine powdered sugar, zest, and juice, stirring with a whisk; drizzle over warm bread. Cool completely on wire rack.
This one was a winner all around (even without chocolate chips!), though Wombat said he would have liked walnuts in it (That’s something he’s going to have to make for himself). That didn’t stop him from making a sad face the day he came home from work and the kids had finished the loaf. Meatball still saved the glaze for last.